Rebar fabrication services reduce field cutting, support accurate placement, and help concrete crews keep schedules, inspections, and deliveries on track.
A Practical Guide to Slab Pod Systems
Pods save concrete, speed up slab prep, and help keep labor under control – but only when the system is specified, set out, and reinforced properly. This guide to slab pod systems is written for builders, concrete crews, and project buyers who need the basics clear before materials hit the site.
What slab pod systems actually do
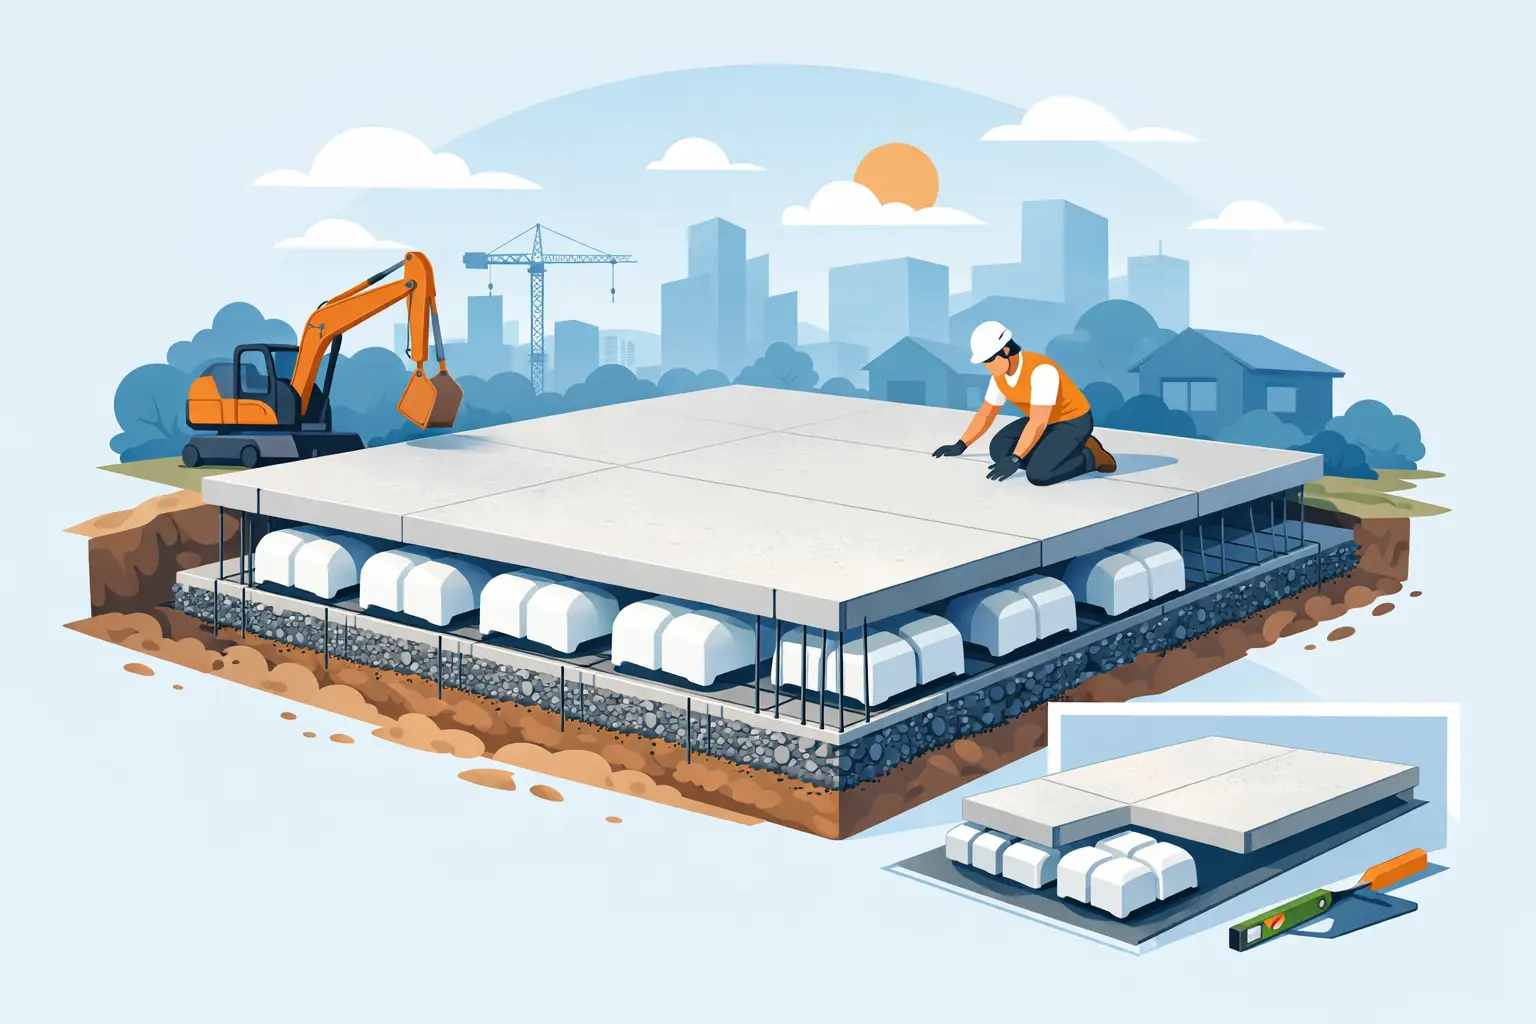
A slab pod system is a waffle-style slab setup that uses void-forming polystyrene pods between concrete ribs. Instead of pouring a full-depth slab across the whole footprint, the pods create gaps while the concrete forms a grid of beams and a thinner topping slab over the top.
That change does two things straight away. It reduces the volume of concrete required, and it creates a stiffened slab profile that can perform well on sites where ground conditions or loading call for a more engineered solution than a plain slab-on-ground. For residential foundations, extensions, and some light commercial work, that can make the system attractive from both a structural and labor point of view.
The catch is that pods are only one part of the system. The slab still depends on the right reinforcing mesh, trench mesh or bars, bar chairs, tie wire, edge forms, vapor barrier, and a layout that matches the engineer’s drawings. If one part is wrong, the speed advantage disappears quickly.
A guide to slab pod systems starts with design intent
Before ordering anything, it helps to be clear on why the slab pod system was selected in the first place. On some jobs, it is about reducing excavation and concrete volume. On others, it is about spanning over variable ground or managing slab stiffness across the footprint. Sometimes it is simply the engineer’s preferred detail for the site classification.
That matters because not every pod slab is interchangeable. Pod dimensions, rib spacing, slab thickness, beam depth, mesh type, bar size, and edge beam details all vary by design. A crew that assumes one job is the same as the last can end up with the wrong pod height, the wrong mesh laps, or reinforcement that clashes at beam intersections.
If you are buying materials, the safest approach is to work from the current engineering set and footing plan, not a takeoff based on memory. It sounds obvious, but slab delays often start with a rushed materials order rather than a problem in the actual pour.
Core components of a slab pod system
The visible part is the polystyrene pod, but the system works because several products are installed together in the right sequence.
Pods create the voids and define the beam grid. Around and between them, reinforcement does the structural work. That usually means a combination of slab mesh, trench mesh, ligatures or stirrups where specified, and loose bars at edges, corners, penetrations, and load points. Bar chairs are then used to hold the steel at the correct height so cover is maintained during the pour.
Tie wire keeps everything fixed in place, and that matters more with pods than some crews expect. Once people start walking the slab, pipe penetrations are adjusted, and the pump line arrives, any loose steel or poorly supported mesh can shift. If the reinforcement drops out of position, the slab no longer matches the design intent.
The system also relies on good subgrade prep, a compacted base where required, moisture barrier installation, and accurate edge formwork. Pods do not fix poor groundwork. They sit on top of it.
Setout and preparation on site
Most slab pod problems are not product failures. They are setout and sequencing errors.
The first issue is level control. If the base is uneven, pods can rock, lift, or create inconsistent beam depths. That causes trouble when placing reinforcement and can lead to concrete overruns because the slab no longer matches the theoretical volume. A tidy, level platform saves time later.
The second issue is pod layout. Pods need to be placed to the engineer’s plan, with the right spacing for ribs, edge beams, and thickened sections. This is where crews can get caught by service penetrations, rebates, step-downs, and internal load-bearing walls. A pod moved 2 inches to suit a pipe run might seem minor, but repeated changes can alter rib continuity and reinforcement placement.
The third issue is traffic on the slab before the pour. Pods are light, which is helpful for handling but not ideal when multiple trades are crossing the area. If the pods are damaged or displaced, concrete can flood voids or beam widths can vary. On busy sites, protecting the setup after placement is part of the job.
Reinforcement is where slab pod systems are won or lost
Any guide to slab pod systems needs to spend time on steel, because this is where compliance and performance really sit.
The mesh has to be the specified grade and size, lapped correctly, and supported properly. Bars in ribs and edge beams need the right placement, especially at corners and around penetrations where stress concentrations are higher. Chairs need to suit the application and provide stable support without punching through membranes or sitting poorly on the substrate.
There is also a practical procurement issue here. If the steel package is incomplete, crews start improvising. They shift bars from one area to another, cut mesh to make pieces fit, or substitute supports that were not intended for the slab. That is where minor shortages become inspection failures or rework.
For that reason, many contractors prefer to line up the reinforcement package in one go – mesh, bar, chairs, tie wire, stirrups, and pods – instead of piecing the order together across different suppliers. It cuts down on mismatch, short deliveries, and wasted site time.
Concrete placement and pour-day realities
Pour day is where a well-prepared pod slab either moves cleanly or becomes expensive.
Before concrete arrives, check steel cover, laps, penetrations, pod stability, and edge beam details. Confirm the membrane is intact and the chairs are still carrying the mesh at the right height. If there has been foot traffic since inspection, look again. Reinforcement movement is common on active sites.
During the pour, concrete placement needs to be controlled so pods are not dislodged and steel is not walked down. Pumping too aggressively into one area can shift lightweight components or overload a section before adjacent areas are filled. Good crews usually work methodically across the slab and keep an eye on whether the reinforcement is holding position.
Vibration and finishing also need a bit of discipline. The slab topping has to finish correctly, but not at the expense of disturbing the rib structure below. As with any engineered slab, placement technique should suit the design rather than a one-size-fits-all site habit.
Cost, speed, and where the trade-offs sit
One reason slab pod systems are popular is the balance they can strike between material efficiency and installation speed. Less concrete volume can mean lower cartage and pouring costs. Lightweight pods are easier to handle than filling a full slab depth with concrete. On the right site, that can make the whole foundation package more efficient.
But it depends on the job.
If the slab design is heavily reinforced, has complex geometry, or includes a lot of service penetrations and step-downs, labor can climb quickly. If the base prep is poor, any savings in concrete can be offset by time spent re-leveling and resetting pods. If deliveries are incomplete, the schedule benefit disappears.
That is why it helps to price the system as a full installed package rather than focusing only on the pod cost. The cheaper pod option is not necessarily the cheaper slab if it creates handling issues, extra waste, or layout complications.
Common mistakes to avoid
The most common mistake is treating pods as the main product and the steel as secondary. In reality, the slab performs because the reinforcement and beam layout are right.
Another mistake is ordering off an old plan revision. That can affect pod count, mesh quantities, bar schedules, and accessories. It is also common to underestimate bar chairs and tie wire, even though both are essential for keeping the reinforcement where it needs to be.
Crews also get caught by inspection timing. If you book inspection before penetrations, bars, laps, and supports are final, you risk a failed signoff and a delayed pour. That is not a material problem – it is a sequencing problem.
Buying slab pod materials without slowing the job down
From a supply point of view, the best slab pod jobs are the ones where materials arrive complete, compliant, and ready for the sequence of work. Builders and concrete contractors do not need a complicated buying process. They need the specified products, clear quantities, competitive pricing, and delivery that matches the program.
That is especially true when the order includes more than just pods. Reinforcing mesh, bar, chairs, tie wire, stirrups, and related site products all need to line up with the drawing set and arrive when the crew can actually install them. A supplier that understands reinforcement, not just one line item, is usually the safer call.
If you are planning a pod slab, get the engineering documents in order first, check the reinforcement schedule carefully, and buy the system as a coordinated package rather than a last-minute patchwork. That is usually the difference between a clean pour and a long day fixing avoidable problems.
Related Posts