Rebar fabrication services reduce field cutting, support accurate placement, and help concrete crews keep schedules, inspections, and deliveries on track.
Guide to Bar Chair Spacing for Concrete Slabs
A slab can have the right rebar or reinforcing mesh on site and still fail inspection if it ends up sitting on the subbase. This guide to bar chair spacing covers the practical part of reinforcement placement: keeping steel at the specified height, maintaining concrete cover, and preventing movement while the crew places concrete.
Bar chairs are a small line item compared with the steel and concrete, but they do a structural job. Too few chairs can allow mesh to sag between supports. Too many can add unnecessary cost and slow down placement. The right layout depends on the reinforcement weight, chair type, slab thickness, ground condition, and the engineer’s drawings.
Why bar chair spacing matters on a slab
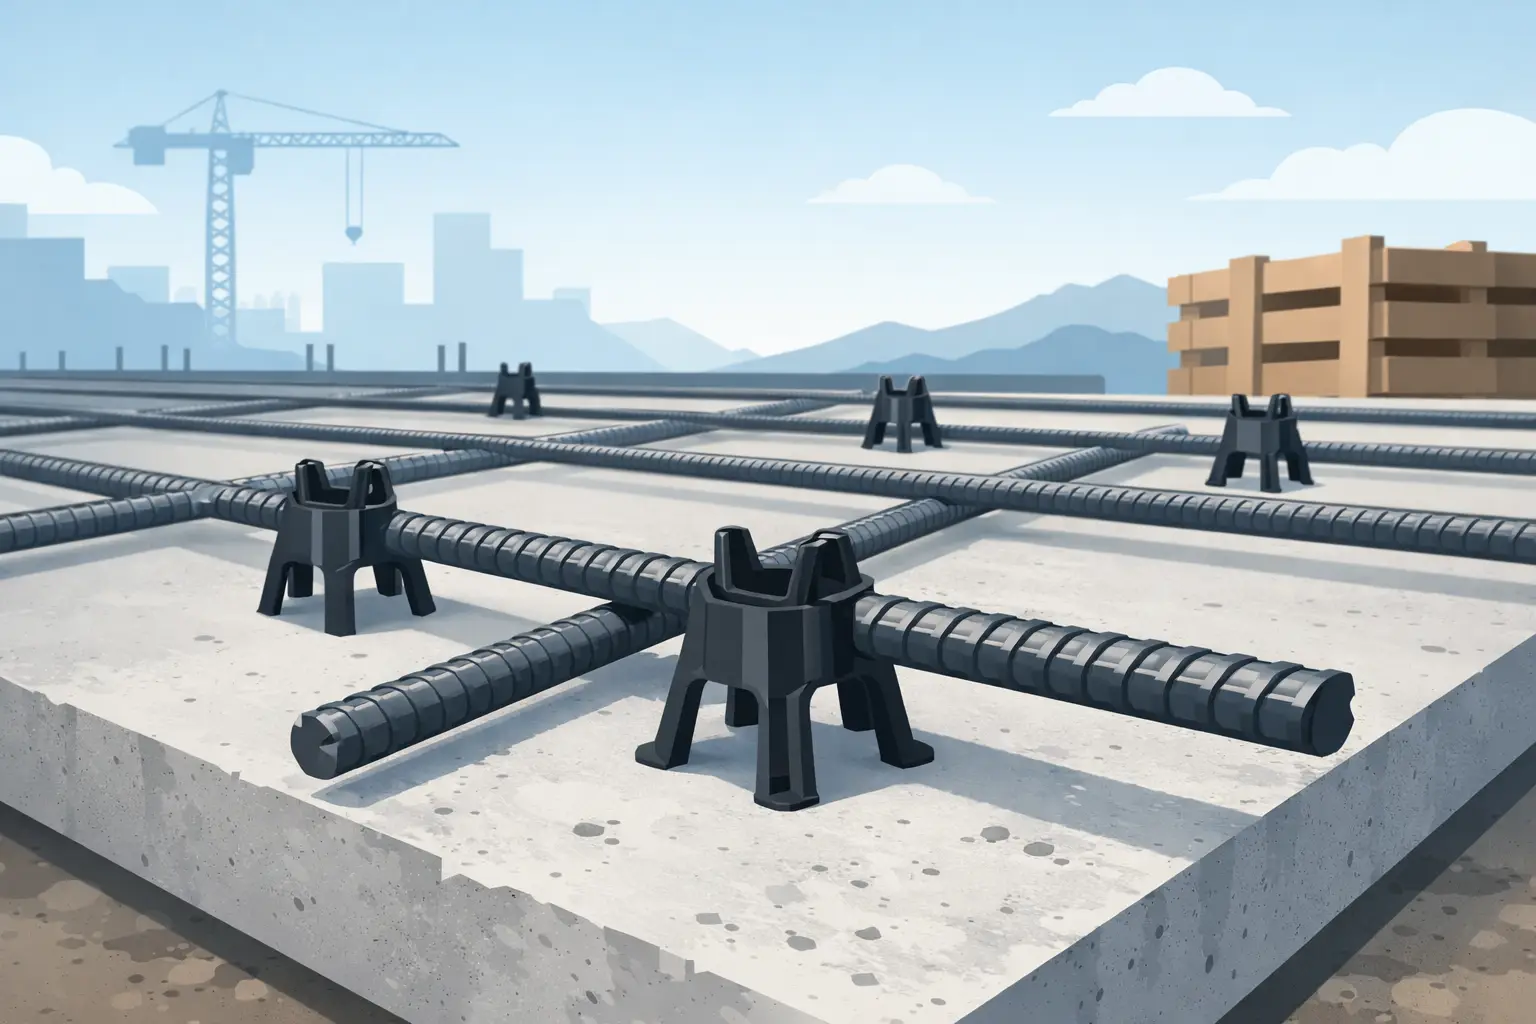
Reinforcement only performs as designed when it stays in its nominated position inside the concrete. Chairs support steel above the vapor barrier, compacted base, formwork, or lower reinforcement layer so the pour achieves the required concrete cover.
When chairs are spaced too far apart, the steel can deflect under its own weight or under foot traffic from the placing crew. Mesh commonly drops at overlaps and near sheet edges. Rebar mats can dip between chairs, particularly where bars are heavier, tied closely, or supporting a second layer of steel. That lost height reduces cover at the bottom and can put the reinforcement outside the design zone.
Poor chair spacing also creates site problems that cost time. The crew may need to stop and lift steel during the pour, chairs may tip over under the pump hose, or an inspector may require sections to be reset. Getting chair layout right before concrete arrives is faster than trying to fix it when the slab is half placed.
Guide to bar chair spacing: start with the drawings
There is no single bar chair spacing rule that suits every slab. The construction drawings and project specifications take priority because they identify the reinforcement position, cover requirements, bar size, mesh grade, slab depth, loading, and any local requirements.
First, confirm whether the reinforcement is a single mesh layer, a rebar mat, top steel over supports, or multiple layers. A light residential slab-on-grade needs a different support layout than a commercial floor carrying heavy bar reinforcement. If the design calls for top and bottom mats, each layer needs proper support. Do not assume the lower chairs can somehow support both layers.
Next, check the required cover. The chair height must place the steel at the correct level after allowing for the bar or mesh diameter. For example, the chair is not selected simply by measuring from the subbase to the top of the reinforcement. Measure from the bearing surface to the chair support point, then confirm the resulting cover beneath and above the steel.
If the drawings do not clearly state chair type or layout, get direction from the project engineer or responsible designer before the pour. A supplier can help identify available chair sizes and suitable products, but cannot replace the project-specific reinforcement design.
Practical starting points for chair centers
For planning purposes, many crews begin with a regular grid and tighten that grid where reinforcement is heavier or exposed to more traffic. A common starting range for standard welded wire mesh in a light slab is roughly 32 to 40 inches between chairs in each direction. That may be reduced where sheets overlap, where the base is uneven, or where workers will walk repeatedly during placement.
For heavier rebar mats, larger bars, or tightly spaced steel, chair centers often move closer, commonly around 24 to 36 inches. The right distance depends on whether the steel remains level and stable between supports. If it visibly sags before concrete is placed, the chairs are too far apart, the chair capacity is too low, or both.
Use a tighter layout at slab edges, construction joints, penetrations, thickened areas, and around openings. These locations frequently have extra bars, lap lengths, trims, or congestion that add weight and make the reinforcement harder to keep in position. The same applies to pump access routes and wheelbarrow paths. A support grid that works in an untouched area may not hold up once the placing crew starts moving across it.
These ranges are field starting points, not a substitute for the drawings. The best test is simple: once the steel is tied and the crew can move over the setup as planned, the reinforcement should stay at the correct elevation without rocking, sinking, or broad deflection.
Match the chair to the reinforcement and bearing surface
Chair spacing only works when the chair itself is suited to the job. A lightweight plastic chair may be appropriate for mesh on a stable slab base, while a heavier rebar support or continuous runner chair may be better for substantial bar mats. The chair must carry the steel and expected site traffic without crushing, bending, or puncturing the vapor barrier.
On soft ground, loose aggregate, or thin vapor barriers, narrow-foot chairs can sink or damage the membrane. Wide-base chairs spread the load better. Where chairs sit directly on a vapor barrier, inspect for tears after the reinforcement is installed and repaired. A chair that remains upright but punches through the barrier has still created a problem.
For welded wire mesh, use chairs that properly cradle the wire rather than balancing it on a narrow point. For rebar, choose support styles that hold the bar securely and allow ties to be installed without forcing the chair out of position. Continuous high chairs can be useful for supporting mesh sheets across a wider area, but they still need sound bearing and appropriate spacing along their length.
Steel chairs, plastic chairs, concrete dobies, and continuous supports each have a place. The material should suit the exposure conditions, specification, and desired finish. In exposed concrete or aggressive environments, make sure the support system is approved for the project rather than selecting purely on price.
Set chairs in a grid, then reinforce the weak spots
Start by marking a workable grid across the pour area. Place chairs under main bar intersections or at locations where mesh will bear evenly. Keep the layout consistent so the crew can see gaps before the steel goes down. Random placement often leaves unsupported spans in the middle of sheets, particularly after laps are tied.
Once the main grid is in place, add chairs at mesh laps. Overlapping sheets create a heavier section that can sag if the nearest supports are only under the outer wires. Also add support beneath bundled bars, top bars, starter bars, and reinforcement around service penetrations.
Do not place chairs so close to forms that they compromise the specified side cover. Edge cover is just as important as bottom cover, and chairs should not push mesh or bars against the formwork. Check the setup after final ties are completed because tying can pull sheets out of line.
Account for foot traffic and concrete placement
A chair layout should be planned for the way concrete will actually be placed, not for an empty slab before the crew arrives. Pump hoses, vibrators, boots, screed rails, and concrete weight all create movement. If the crew needs access across the steel, consider designated walk boards or temporary access paths rather than expecting chairs to absorb repeated foot traffic.
Before the truck arrives, walk the reinforcement and look for sections that move. Check chair legs are fully seated, supports are not tilted, and mesh sheets are tied sufficiently at laps. Confirm bar chairs have not shifted while other trades installed conduits, plumbing, or hold-downs.
During the pour, assign someone to watch reinforcement elevation. Small adjustments are normal, but repeated lifting of dropped mesh is a sign the support layout was not adequate. Do not pull steel upward with hooks and assume it will stay there once concrete covers it. Add support where needed while there is still access.
Common chair-spacing mistakes
The most common mistake is using a standard chair grid everywhere, regardless of bar size, lap locations, or site conditions. A 40-inch grid may be fine in one part of a slab and inadequate around a thickened edge or a double layer of steel.
Another issue is selecting chair height without allowing for the reinforcement diameter. This can leave the bar too low even when every chair is correctly spaced. It is also common to underestimate the effect of a rough base. If chairs are sitting on uneven stone, their actual support heights can vary enough to affect reinforcement level.
Finally, avoid treating chairs as an afterthought. Order enough of the correct height and type with the reinforcing steel. Running short on chairs shortly before a pour leads to improvised supports, uneven spacing, and delays no contractor needs.
A good chair layout is not complicated: follow the drawings, use supports sized for the steel and bearing surface, tighten spacing where loads and traffic increase, and inspect the setup before placement. That preparation keeps reinforcement where the design intended and gives the concrete crew a cleaner, faster pour.
Related Posts