Rebar fabrication services reduce field cutting, support accurate placement, and help concrete crews keep schedules, inspections, and deliveries on track.
How to Install Tie Wire for Secure Rebar Cages
Tie wire is a small item on a reinforcement order, but loose ties can turn into a major site problem once a rebar mat shifts under foot traffic, a cage opens during lifting, or concrete placement starts. Knowing how to install tie wire properly keeps reinforcing steel in the position shown on the drawings until the concrete has been placed and consolidated.
For most slab, footing, beam, wall, and column work, the job is not about making every intersection immovable. It is about holding the reinforcement assembly securely, maintaining cover, and preventing bars from moving out of spacing or alignment. The required tie pattern depends on the detail, the size of the assembly, how it will be handled, and the placement method.
What tie wire does on a reinforcement job
Annealed tie wire is soft steel wire used to fasten reinforcing bars, mesh, stirrups, and other reinforcement components together. It keeps the steel organized during assembly and stable while concrete is poured. It is not a substitute for correct bar chairs, spacers, cover blocks, or properly detailed laps and bends.
Tie wire also does not add meaningful structural strength to the completed reinforced-concrete member. Its purpose is temporary but critical: hold the steel where the engineer intended it to be before the concrete sets.
For general work, black annealed steel tie wire is the common choice because it is pliable, easy to twist, and economical. On exposed, corrosive, or specialty work, the project specification may call for coated, galvanized, stainless, or another compatible wire. Check the drawings and specification before substituting materials, particularly where corrosion protection is part of the design.
Tools and materials to have ready
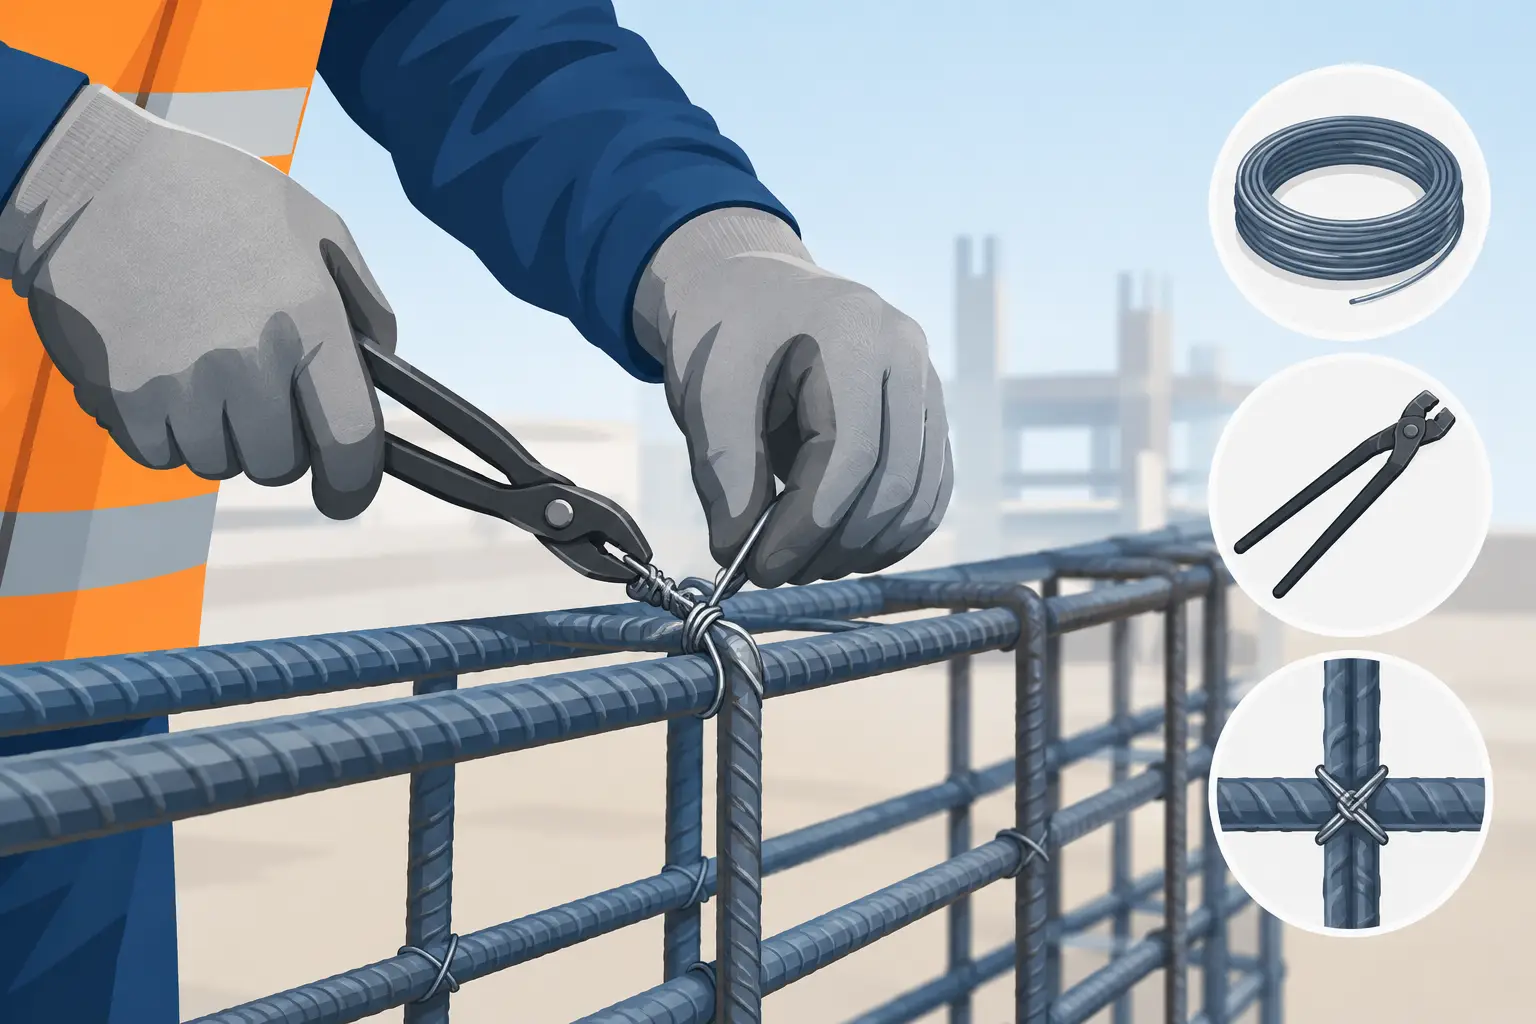
A clean tie-wire setup saves time and reduces wasted motion around the steel. Have the correct wire gauge, a reel or coil holder, end-cutting nippers, and a rebar tying tool ready before assembly starts. Manual hook twisters work well for standard site work. Battery-powered tying tools can be worthwhile on large slabs, repetitive mesh work, or production rebar cages where labor time is the main cost.
Wear gloves, safety glasses, long sleeves, and footwear with puncture-resistant soles. Cut wire ends are sharp, and rebar offcuts create obvious trip and puncture hazards. Keep protruding rebar protected where required, and do not leave twisted wire tails sticking upward where crews will walk or kneel.
The wire needs to suit the bar size and the tie method. A lighter gauge is faster to twist but can snap or loosen when used on heavy bar or lifted cages. Heavier wire holds better but takes more effort and can slow repetitive work. For most standard reinforcing work, select a wire size that can be tightened without breaking while still allowing the crew to work efficiently.
How to install tie wire at a rebar intersection
Start only after the reinforcing steel has been set to the drawing dimensions. Confirm bar sizes, spacing, laps, hooks, stirrup spacing, and cover support locations first. Tie wire can hold a bad layout together just as effectively as a good one, so inspection before tying matters.
1. Position the bars and maintain cover
Set the bars or mesh on the specified chairs, spacers, or supports. Do not rely on tie wire to lift reinforcement off the subgrade, formwork, or vapor barrier. The cover dimension must be maintained across the whole pour, including slab edges, footing bottoms, beam sides, and around penetrations.
Where mesh sheets overlap, set the required lap length before tying. Where bars lap, keep them in the location and arrangement shown on the reinforcement detail. If the cage is being built off the ground for later lifting, use enough temporary support to keep it square and prevent sagging.
2. Feed the wire under the crossing bars
Cut a workable length of wire from the coil, usually long enough to wrap the intersection and leave two tails for twisting. Slide the midpoint of the wire under the crossing bars. Bring both ends up on opposite sides of the intersection.
For a simple snap tie, cross the wire tails over the top bar. Hook both tails with the tying tool, then pull upward lightly while twisting. The wire should pull the bars snugly together without crushing the wire or forcing the bar out of position.
3. Twist tight, then turn the tail down
Make several firm twists until the tie is secure. Avoid over-twisting. A tie that snaps has to be replaced, and excessive twisting wastes wire and creates sharp ends.
Once tight, bend the twisted tail down toward the inside of the cage or away from the working surface. This protects gloves, reduces snagging, and prevents wire ends from interfering with concrete cover. On top mats, make sure tails do not create an obstruction for finishers or crews placing concrete.
4. Use the right tie pattern for the work
A simple snap tie is suitable for many standard intersections where the steel will not be moved much. For grid reinforcement, alternate the direction of the twists so the assembly stays square and does not pull out of line.
Use a wrap-and-snap tie, sometimes called a saddle tie, where more holding power is needed. This method wraps the wire around one bar before crossing and twisting, giving better resistance to movement. Figure-eight ties are useful where bars may shift in more than one direction, such as corners, vertical work, or cages that will be lifted.
The goal is not to use the strongest tie at every crossing. It is to use enough ties, in the right locations, to keep the full assembly stable through inspection, crew access, pumping, vibration, and placement.
Where ties matter most
The reinforcing drawings and project specifications control tie locations. If they call for every intersection to be tied, tie every intersection. If they do not, a practical tie pattern can reduce labor without sacrificing stability, provided the steel remains correctly positioned.
Pay close attention to perimeter bars, corners, bar ends, laps, intersections near openings, dowels, changes in bar direction, and the first and last stirrup in a beam or column cage. These are the areas most likely to spread, rack, or move during handling.
For welded wire reinforcement or rebar mesh placed flat in a slab, tying every crossing is rarely necessary unless the design or inspector requires it. Secure sheet overlaps, edges, cut sections, and enough internal points to stop the mesh from separating or walking during the pour. Mesh must still be supported at the specified elevation. Pulling it up with hooks while concrete is placed is not a replacement for chairs.
For column cages, beam cages, and wall reinforcement, tie more frequently. A cage that is moved by crane, carried by a crew, or stood upright needs ties that resist racking. Add ties at corners and at regular intervals along longitudinal bars and stirrups. If the cage flexes excessively when lifted, it needs more bracing, more ties, or a different lifting plan.
Common tie-wire mistakes that cause rework
The most common error is treating tie wire as the only support system. A neatly tied mat can still fail inspection if it has insufficient cover or sinks when workers step on it. Use approved bar chairs and spacers at a spacing suited to the bar size, mesh weight, and expected site traffic.
Another issue is tying before the reinforcement is checked. Once a large mat or cage is fully tied, correcting a missed lap, wrong bar spacing, or misplaced penetration takes longer. Set out, measure, and inspect sections as work progresses.
Loose ties are equally troublesome. If a bar can rotate freely or mesh sheets separate at the lap, the tie is not doing its job. On the other hand, ties should not pull bars so hard that they distort spacing, lift a bar off its chair, or bend light mesh out of plane.
Do not use tie wire to repair damaged rebar, join bars where a lap or mechanical coupler is required, or hold reinforcement that lacks proper support. Those issues need to be corrected to the project detail, not improvised at the pour line.
Final checks before concrete placement
Walk the steel before calling for concrete. Check that the reinforcement is secure, chairs remain upright, laps are correct, bars are clear of forms where cover is required, and wire tails are bent away. Look for loose mesh at sheet overlaps, open stirrups, displaced dowels, and areas where foot traffic has pushed steel down.
Then consider the placement plan. A pumped pour, wheelbarrow access, heavy vibrator use, or a crew working from the reinforcing steel can all shift the assembly. Add temporary walk boards or extra support where needed. Keep someone assigned to watch the steel during placement, especially at edges, around openings, and at congested beam or column zones.
Good tie wire work is straightforward: use suitable wire, tie the locations that control movement, support the steel correctly, and inspect before the truck arrives. That small amount of discipline helps the reinforcement stay where the design needs it when the concrete work gets busy.
Related Posts