Rebar fabrication services reduce field cutting, support accurate placement, and help concrete crews keep schedules, inspections, and deliveries on track.
Slab Pod Installation Example for a Clean Pour
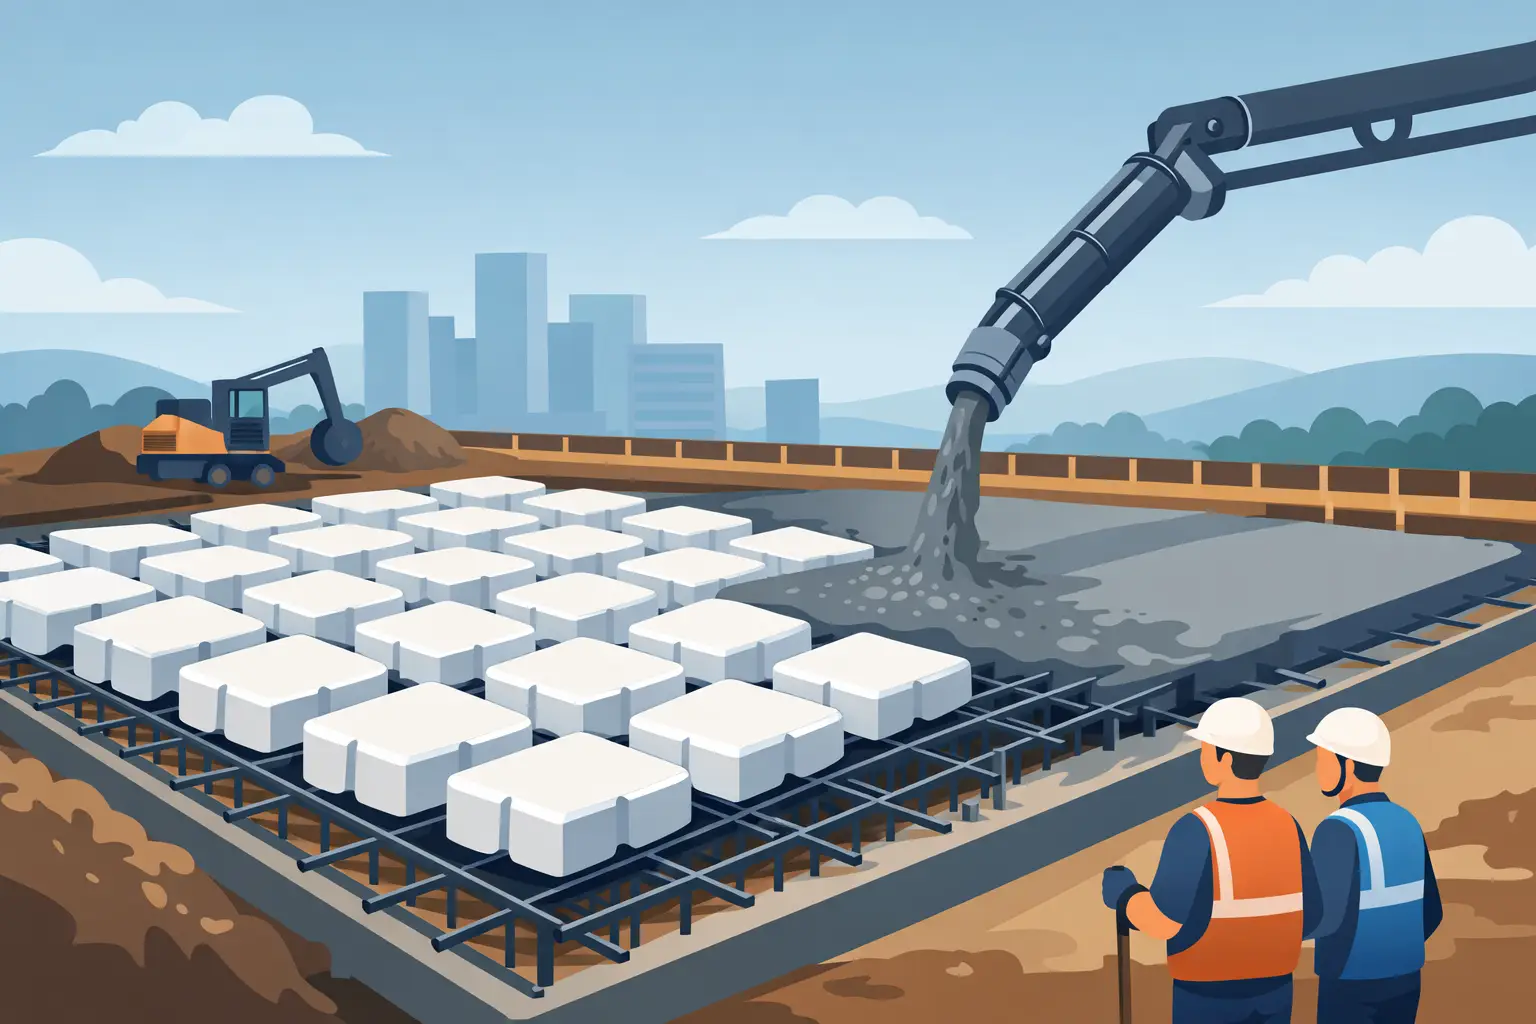
A slab pod installation example is most useful when it shows the sequence that prevents expensive mistakes: prepare the base, set the pods to the approved layout, keep the reinforcement at the specified cover, inspect the work, then pour without shifting the system. Pods are not a substitute for good site preparation or engineered steel. They are part of a slab system that only performs as designed when every layer is in the right place.
For a typical residential foundation, the crew is working with polystyrene void-former pods placed between concrete ribs. The pods reduce the volume of concrete required while the reinforced ribs carry the structural loads. Dimensions, steel sizes, thickened edges, beam locations, and service penetrations must come from the approved slab plan. This example explains the site process, not a replacement for that design.
What This Slab Pod Installation Example Assumes
Picture a rectangular single-story home slab on a prepared building platform. The engineer’s plan calls for perimeter thickening, internal reinforced ribs, polystyrene pods between ribs, welded wire mesh across the slab area, and additional reinforcing bar at nominated beams, corners, and penetrations.
Before materials arrive, the foreman checks the current structural drawings against the site setout. Confirm slab dimensions, finished floor level, beam widths, pod size, mesh designation, bar schedules, cover requirements, and any local inspection hold points. A pod that looks close enough but does not match the design can change rib width or concrete cover. That is not a field adjustment to make without approval.
The material takeoff should also include bar chairs, tie wire, spacers, vapor barrier where specified, and enough reinforcing bar for laps, starter bars, trimmers, and site-cut pieces. Ordering the main mesh but forgetting chairs is a common way to create a last-minute delay before a pour.
Start With a Stable, Accurate Base
The slab assembly is only as good as the platform underneath it. Strip organic material and unsuitable fill, then construct and compact the subbase to the geotechnical and engineering requirements. Check levels regularly. High spots can lift pods and reduce concrete depth, while low spots can create excessive slab thickness and make it harder to maintain the planned finished floor level.
Once compaction testing and base acceptance are complete, establish control lines and benchmark levels. Set out the perimeter first, then mark the internal rib grid from the approved dimensions. Avoid relying on a rough chalk layout alone. String lines, laser levels, and fixed reference points make it easier to spot an accumulating error before the pod field is covered with steel.
If the design requires a vapor barrier, install it cleanly over the prepared base with overlaps and penetrations treated as specified. Keep it flat and repair tears before placing pods. Moisture protection details vary by project and jurisdiction, so follow the slab plan and local requirements rather than copying a detail from another job.
Lay Out Pods From the Ribs, Not the Walls
With the perimeter and beam lines established, place pods so the designed concrete ribs remain open and consistent. Start at a known corner or a major internal beam, not wherever the first stack of pods happens to land. Work across the slab in rows, checking the rib width as the layout progresses.
Pods should sit firmly on the base without rocking. Trim only where the drawings allow it, such as at perimeter closures or around a properly detailed penetration. Do not randomly cut pods to force a fit around an unexpected service line. A changed rib, missing concrete section, or poorly supported pipe needs review before the pour.
In this slab pod installation example, the crew reaches a plumbing penetration near the center of a room. Instead of cutting away a large section and leaving an irregular void, they stop, confirm the penetration detail, install the required trim bars, and form the opening to preserve the designed concrete around it. This is slower than making a quick cut, but far cheaper than repairing a weak or cracked slab later.
Keep pods clear of perimeter beams, internal load-bearing ribs, and designated thickened areas. At door openings, columns, point loads, and service clusters, the pod pattern often changes. Those locations deserve a direct check against the drawings because they are where additional reinforcement and solid concrete are most likely to be required.
Install Reinforcement at the Correct Height
After pod placement is accepted, install reinforcing bar in the perimeter and internal ribs as scheduled. Tie intersections securely enough to prevent movement during mesh placement and concrete placement. Laps, bends, hooks, and bar spacing need to match the approved details. If a bar is short, do not assume an arbitrary overlap is acceptable.
Place bar chairs and support the welded wire mesh so the mesh stays at its designed level within the slab. Mesh sitting directly on pods or vapor barrier is not doing the job intended by the design. The same applies to mesh that is pulled up by hand during the pour. It may look better from the surface, but it is difficult to control and rarely gives consistent placement.
Chair spacing depends on mesh weight, slab conditions, foot traffic, and the support method. The practical test is simple: the steel should hold its elevation when installers walk carefully across the work area and when concrete is placed nearby. Add support where mesh sags, particularly at laps, around penetrations, and near access routes.
Services must be secured before steel is finalized. Pipes and conduits should not displace reinforcement, reduce cover, or create an unapproved gap in a rib. Where services cross structural elements, use the engineered penetration detail. Coordinate early with the plumbing and electrical crews. Fixing a missed line after the mesh is tied usually means cutting, retying, and losing time on pour day.
Complete a Pre-Pour Check Before the Truck Arrives
A proper inspection is where a clean installation becomes a dependable slab. Walk the site with the drawings in hand and check dimensions, pod orientation, beam clearances, pod stability, mesh laps, bar laps, chairs, cover, penetrations, edge forms, and finished levels. Remove offcuts, loose tie wire, packaging, and standing water.
For larger or more complex work, assign one person to verify reinforcement and another to verify levels and formwork. Fresh eyes catch details that a crew working to a deadline can overlook. Take clear photos of the steel and pod layout before concrete covers the work, particularly at beams, corners, openings, and service penetrations.
During placement, use a controlled pour sequence that does not shove pods, roll mesh, or overload one area. Keep enough crew on the slab to manage concrete, vibration where required, screeding, and steel position. If a pod shifts or reinforcement is displaced, stop and correct it while the area is still accessible. Continuing to place concrete over a known problem only makes the repair harder.
Where the Example Changes
The process stays broadly similar, but the details change with the project. A garage slab may need different loading provisions than a living area. A site with poor soil can require a more involved foundation solution. A commercial floor may use heavier reinforcement, deeper beams, tighter tolerances, and more formal inspection requirements.
Weather also affects the work. Wet ground can damage the prepared base, high wind can move lightweight pods and vapor barrier, and hot conditions can shorten the finishing window. Schedule delivery so pods, mesh, chairs, and tie wire are on site before the crew needs them, but protect polystyrene pods from unnecessary damage and exposure.
The best result comes from treating pod installation as a coordinated structural task, not a filler step before concrete. Get the right pods, reinforcement, supports, and fixing materials to site early, follow the approved slab design, and give the pre-pour inspection the time it needs. That is how a pod slab stays on schedule and performs as intended long after the forms are gone.
Related Posts